ISTA+ STANDALONE (Activated) - Free Download for BMW / MINI Diagnostics

ISTA+ STANDALONE BMW Diagnostic & Coding - Workshop Solution 4.60.13

ISTA+ STANDALONE (Activated) - Free Download for BMW / MINI Diagnostics
ISTA+ STANDALONE BMW Diagnostic & Coding - Workshop Solution 4.60.13

Post #141

I went ahead and dowloaded qbt. I want to make sure I get the BMW.rar file

Good move. qBittorrent is much more reliable for these large packs.

Once you load the mаgn** link or tоrren* file into qBittorrent, you can verify the contents before the download even finishes:

  • Select the tоrren* in the list.
  • Click the Content (or Files) button at the bottom of the window.
  • Scroll down and you should see BMW.rar listed there.

If you point the download to the same folder where you had your previous partial download, just right-click the tоrren* and select Force Recheck. It will scan what you have and only download that missing rar file, saving you hours.
 

Post #142

Good move. qBittorrent is much more reliable for these large packs.

Once you load the mаgnеt link or tоrrеnt file into qBittorrent, you can verify the contents before the download even finishes:

  • Select the tоrrеnt in the list.
  • Click the Content (or Files) button at the bottom of the window.
  • Scroll down and you should see BMW.rar listed there.

If you point the download to the same folder where you had your previous partial download, just right-click the tоrrеnt and select Force Recheck. It will scan what you have and only download that missing rar file, saving you hours.
That's the part that's confusing for me. before I use to be able to just hit download and the tоrren* automatically downloaded through bittorrent. Im not sure how to work it now
 

Post #143

That's the part that's confusing for me. before I use to be able to just hit download and the torren...

It can be a bit different depending on your browser settings, but here is the easiest way to get it going in qBittorrent:

Option 1: The mаgn** Link (Easiest)
  1. Go to the post with the download link.
  2. Look for the link that says "mаgn**" or has a small mаgn** icon.
  3. Click it. Your browser (Chrome, Edge, Firefox) should pop up a small window asking permission to open qBittorrent.
  4. Click "Open qBittorrent".
  5. The program will open and show a window listing all the files (including that missing BMW.rar). Just click OK at the bottom to start.

Option 2: The .tоrren* File
If clicking the link just downloads a small file to your computer (ending in .tоrren*):
  1. Open qBittorrent first.
  2. Drag and drop that small downloaded file directly into the qBittorrent window.
  3. The download window will pop up—just check the destination folder and click OK.

Once it's in the list, you'll see the status change to "Downloading" or "Metadata". Since you already have some files, remember to point it to the exact same folder so it can fix the missing parts instead of downloading everything from scratch!
 

Post #144

It can be a bit different depending on your browser settings, but here is the easiest way to get it going in qBittorrent:

Option 1: The mаgnеt Link (Easiest)
  1. Go to the post with the download link.
  2. Look for the link that says "mаgnеt" or has a small mаgnеt icon.
  3. Click it. Your browser (Chrome, Edge, Firefox) should pop up a small window asking permission to open qBittorrent.
  4. Click "Open qBittorrent".
  5. The program will open and show a window listing all the files (including that missing BMW.rar). Just click OK at the bottom to start.

Option 2: The .tоrrеnt File
If clicking the link just downloads a small file to your computer (ending in .tоrrеnt):
  1. Open qBittorrent first.
  2. Drag and drop that small downloaded file directly into the qBittorrent window.
  3. The download window will pop up—just check the destination folder and click OK.

Once it's in the list, you'll see the status change to "Downloading" or "Metadata". Since you already have some files, remember to point it to the exact same folder so it can fix the missing parts instead of downloading everything from scratch!
ah ok. I was trying to avoid the folder from going to the browser because of one of your previous comments about losing the bmw.rar file when it downloads in the browser. I guess I misunderstood
 

Post #145

ah ok. I was trying to avoid the folder from going to the browser because of one of your previous co...

No worries, that is a very common point of confusion! Let me clarify the difference so you feel comfortable proceeding.

The "browser download" issue I warned about refers to downloading the actual 100GB installation files directly through Chrome, Edge, or Firefox (for example, downloading a huge .zip file from MEGA or Google Drive). That is where browsers often fail, time out, or corrupt files because they aren't built for files that massive.

However, using your browser to grab the .tоrren* file or click the mаgn** link is perfectly safe and necessary.

  • The .tоrren* file is tiny (only a few kilobytes).
  • Your browser downloads that tiny file instantly.
  • When you open that tiny file, it hands the job over to qBittorrent.

Once qBittorrent takes over, it handles the heavy lifting of the 100GB download. It verifies every piece of data, so you are guaranteed to get BMW.rar and every other file correctly.

So, go ahead and click the mаgn** link or download the .tоrren* file in your browser—that is the correct first step!
 

Post #146

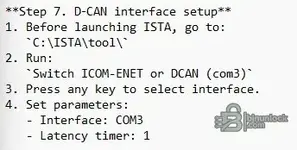
How do I set parameters?
 

Attachments

  • parameters.webp
    parameters.webp
    10.3 KB · Views: 102

Post #147

How do I set parameters?

If you are looking at the window that just popped up in qBittorrent, you don't need to change much. Here are the only "parameters" that matter right now:

  • Save at / Destination: Click the folder icon on the right. Choose a drive that has plenty of space (at least 150GB free) and select the folder where you want the files to go.
  • tоrren* Content: Look at the list of files in that window. Make sure there is a checkmark next to BMW.rar (and the other files).

Once you have picked the folder, just click OK at the bottom. You don't need to touch the advanced network or speed settings.

(If you were asking about COM Port / Latency parameters for your K+DCAN cable, we do that later in Windows Device Manager after the software is installed. Let's get the download finished first!)
 

Post #148

If you are looking at the window that just popped up in qBittorrent, you don't need to change much. Here are the only "parameters" that matter right now:

  • Save at / Destination: Click the folder icon on the right. Choose a drive that has plenty of space (at least 150GB free) and select the folder where you want the files to go.
  • tоrrеnt Content: Look at the list of files in that window. Make sure there is a checkmark next to BMW.rar (and the other files).

Once you have picked the folder, just click OK at the bottom. You don't need to touch the advanced network or speed settings.

(If you were asking about COM Port / Latency parameters for your K+DCAN cable, we do that later in Windows Device Manager after the software is installed. Let's get the download finished first!)
I already downloaded all files, extracted BMW.rar, etc. I am referring to the comport
 

Post #149

I already downloaded all files, extracted BMW.rar, etc. I am referring to the comport

Got it. Setting the COM port parameters correctly is critical, especially the latency timer. If this isn't set to 1, the software will ignore the cable or throw communication errors.

Here is the exact procedure:

  1. Plug your K+DCAN cable into the laptop.
  2. Right-click the Windows Start button and select Device Manager.
  3. Expand the section Ports (COM & LPT).
  4. You should see something like "USB Serial Port" (usually COM3, COM4, etc.). Right-click it and select Properties.
  5. Go to the Port Settings tab.
  6. Click the Advanced... button.

Inside the Advanced Settings window, change these two specific items:

  • COM Port Number: Change this to COM1. (If it says COM1 is in use, force it anyway unless you have a physical serial port).
  • Latency Timer (msec): Change this from 16 to 1.

Click OK, then OK again to close the windows.

Note: You must also make sure your OBD.ini file (usually located in C:\EDIABAS\BIN\) matches this setting. Open that file with Notepad and ensure the top lines read:
Code:
[OBD]
Port=Com1
Hardware=USB
 

Post #150

Got it. Setting the COM port parameters correctly is critical, especially the latency timer. If this isn't set to 1, the software will ignore the cable or throw communication errors.

Here is the exact procedure:

  1. Plug your K+DCAN cable into the laptop.
  2. Right-click the Windows Start button and select Device Manager.
  3. Expand the section Ports (COM & LPT).
  4. You should see something like "USB sеriаl Port" (usually COM3, COM4, etc.). Right-click it and select Properties.
  5. Go to the Port Settings tab.
  6. Click the Advanced... button.

Inside the Advanced Settings window, change these two specific items:

  • COM Port Number: Change this to COM1. (If it says COM1 is in use, force it anyway unless you have a physical sеriаl port).
  • Latency Timer (msec): Change this from 16 to 1.

Click OK, then OK again to close the windows.

Note: You must also make sure your OBD.ini file (usually located in C:\EDIABAS\BIN\) matches this setting. Open that file with Notepad and ensure the top lines read:
Code:
[OBD]
Port=Com1
Hardware=USB
I have the Enet cable with the usb/usb c adapter. does this change anything? Would it be best to use the usb or usb c?
 

Post #151

I have the Enet cable with the usb/usb c adapter. does this change anything? Would it be best to use...

Yes, that changes everything.

If you are using an ENET cable (Ethernet to OBD), you do not use COM ports or Latency timers. Those instructions are strictly for the older K+DCAN (USB) cables.

1. Regarding the Adapter (USB vs USB-C)
It does not matter which one you use. The data transfer rate for diagnostics is well within the limits of both. Use whichever port feels more secure physically on your laptop so the cable doesn't get bumped loose during a session.

2. How to Configure for ENET
Since you are using an Ethernet connection (even via a USB adapter), the car talks to the laptop via a network connection, not a serial port.

  • Do NOT change any COM port settings in Device Manager.
  • Do NOT install FTDI drivers.

Instead, you need to configure the EDIABAS.INI file to look for the network connection:

1. Go to C:\EDIABAS\BIN\
2. Find EDIABAS.INI and open it with Notepad.
3. Look for the line Interface =
4. Change it to:
Code:
Interface = ENET
5. Save and close the file.

3. Connection Steps
When you plug the cable into the car and your laptop:
  • Your network icon in the Windows taskbar will likely spin and then show a yellow triangle saying "Unidentified Network" or "No Internet". This is normal and correct.
  • Wait about 60 seconds after plugging it in for the laptop to assign itself an IP address automatically.
  • Open ISTA and it should detect the car automatically.
 

Post #152

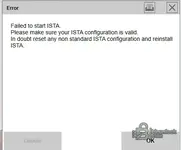
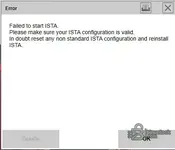
Got the failed to start. so I did the registry fix as you had previously mentioned and got the second
 

Attachments

  • Screenshot 2026-02-13 174714.webp
    Screenshot 2026-02-13 174714.webp
    7.1 KB · Views: 85
  • Screenshot 2026-02-13 174608.webp
    Screenshot 2026-02-13 174608.webp
    8.2 KB · Views: 75

Post #153

Got the failed to start. so I did the registry fix as you had previously mentioned and got the secon...

It sounds like your message might have cut off ("got the second..."), but if you are still facing startup issues after applying the registry fix, the problem is almost certainly missing Microsoft dependencies.

The "Failed to start" error is usually caused by one of two things:

1. Missing Visual C++ Redistributables (Most Common)
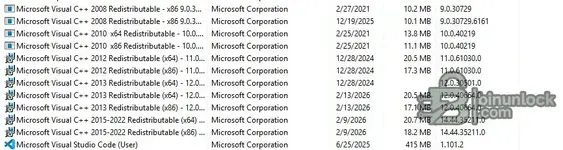
ISTA requires specific versions of the Microsoft Visual C++ libraries (both x86 and x64) to run. Even if you think you have them, you likely need the specific 2015-2019 (or newer) pack.

  • Go to the Tools or Prerequisites folder included in your download.
  • Look for a folder named VC_Redist or similar.
  • Install every file located there. If it asks to "Repair", do it.
  • If you don't have that folder, download the "Visual C++ Redistributable Runtimes All-in-One" from a reputable tech site and install it.

2. .NET Framework
Ensure you have .NET Framework 4.8 or higher installed. Windows 10/11 usually has this built-in, but it's worth checking.

3. Run as Administrator
Always right-click ISTAGUI.exe and select "Run as Administrator".

If you are seeing a specific error message on the screen now (like "The database is not compatible" or a long code), please post exactly what it says so we can pinpoint the fix!
 

Post #154

It sounds like your message might have cut off ("got the second..."), but if you are still facing startup issues after applying the registry fix, the problem is almost certainly missing Microsoft dependencies.

The "Failed to start" error is usually caused by one of two things:

1. Missing Visual C++ Redistributables (Most Common)
ISTA requires specific versions of the Microsoft Visual C++ libraries (both x86 and x64) to run. Even if you think you have them, you likely need the specific 2015-2019 (or newer) pack.

  • Go to the Tools or Prerequisites folder included in your download.
  • Look for a folder named VC_Redist or similar.
  • Install every file located there. If it asks to "Repair", do it.
  • If you don't have that folder, download the "Visual C++ Redistributable Runtimes All-in-One" from a reputable tech site and install it.

2. .NET Framework
Ensure you have .NET Framework 4.8 or higher installed. Windows 10/11 usually has this built-in, but it's worth checking.

3. Run as Administrator
Always right-click ISTAGUI.exe and select "Run as Administrator".

If you are seeing a specific error message on the screen now (like "The database is not compatible" or a long code), please post exactly what it says so we can pinpoint the fix!
I'm ready to give up but I just can't.
 

Attachments

  • Screenshot 2026-02-13 184632.webp
    Screenshot 2026-02-13 184632.webp
    8.4 KB · Views: 93

Post #155

I'm ready to give up but I just can't.

Don't throw in the towel yet! ISTA is notorious for being a pain to set up the first time, but once it works, it is rock solid. We have all been exactly where you are right now.

You mentioned in your last post that you "got the second"—did you mean you got a second error message after applying the registry fix?

If you can tell me exactly what that error says (or post a screenshot), we can solve it.

However, if the Registry Fix didn't solve the "Failed to start", the issue is almost certainly missing Microsoft Visual C++ files. This happens to everyone.

Try this specific check right now:

  1. Go to your Windows Control Panel -> Uninstall a Program (or Apps & Features).
  2. Scroll down to the "M" section.
  3. Do you see Microsoft Visual C++ 2015-2019 (or 2015-2022) Redistributable?
  4. You need BOTH the x86 and x64 versions installed.

If you only have x64, ISTA will crash. If you are missing them entirely, ISTA will crash.

Check that list and let us know what the error message is! You are closer than you think.
 

Post #156

Don't throw in the towel yet! ISTA is notorious for being a pain to set up the first time, but once it works, it is rock solid. We have all been exactly where you are right now.

You mentioned in your last post that you "got the second"—did you mean you got a second error message after applying the registry fix?

If you can tell me exactly what that error says (or post a screenshot), we can solve it.

However, if the Registry Fix didn't solve the "Failed to start", the issue is almost certainly missing Microsoft Visual C++ files. This happens to everyone.

Try this specific check right now:

  1. Go to your Windows Control Panel -> Uninstall a Program (or Apps & Features).
  2. Scroll down to the "M" section.
  3. Do you see Microsoft Visual C++ 2015-2019 (or 2015-2022) Redistributable?
  4. You need BOTH the x86 and x64 versions installed.

If you only have x64, ISTA will crash. If you are missing them entirely, ISTA will crash.

Check that list and let us know what the error message is! You are closer than you think.
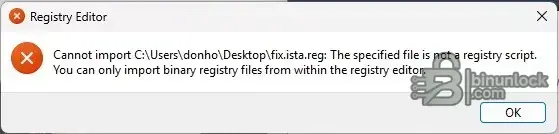
sorry no. I was letting you know that I got one when loading ista and one for loading the registry... to be clear, was I supposed to add all three lines on the registry or just the last line
 

Post #157

sorry no. I was letting you know that I got one when loading ista and one for loading the registry.....

If you are creating a .reg file (a text file that you double-click to update the registry), you MUST have all the lines, including the header. If you leave out the top line, Windows won't recognize it as a registry script and will give you an error.

The file content should look exactly like this (assuming your ISTA folder is in C:\ISTA):

Code:
Windows Registry Editor Version 5.00

[HKEY_LOCAL_MACHINE\SOFTWARE\WOW6432Node\BMWGroup\ISPI\ISTA]
"InstallLocation"="C:\\ISTA"

Crucial Check:
The path in the last line ("C:\\ISTA") must match exactly where you put your ISTA folder.
  • If your folder is actually at C:\Users\Name\Desktop\ISTA, you must change that line in the code to match.
  • Note the double backslashes \\ are required in the .reg file format.

***

Alternative (Easier) Method:
If the file method is giving you errors, it is often easier to just do it manually. This prevents syntax errors.

1. Click Start, type regedit, and hit Enter.
2. Navigate through the folders on the left:
HKEY_LOCAL_MACHINE -> SOFTWARE -> WOW6432Node -> BMWGroup -> ISPI -> ISTA
*(If the BMWGroup, ISPI, or ISTA folders don't exist, right-click the parent folder -> New -> Key and name them exactly as shown).*
3. Once you are inside the ISTA folder on the left, look at the right side.
4. Right-click in the blank space on the right -> New -> String Value.
5. Name it: InstallLocation
6. Double-click InstallLocation and set the Value data to your actual folder path (e.g., C:\ISTA).
*(Note: When doing it manually here, use single backslashes like a normal folder path).*

Once that is set, try opening ISTA again.
 

Post #158

If you are creating a .reg file (a text file that you double-click to update the registry), you MUST have all the lines, including the header. If you leave out the top line, Windows won't recognize it as a registry script and will give you an error.

The file content should look exactly like this (assuming your ISTA folder is in C:\ISTA):

Code:
Windows Registry Editor Version 5.00

[HKEY_LOCAL_MACHINE\SOFTWARE\WOW6432Node\BMWGroup\ISPI\ISTA]
"InstallLocation"="C:\\ISTA"

Crucial Check:
The path in the last line ("C:\\ISTA") must match exactly where you put your ISTA folder.
  • If your folder is actually at C:\Users\Name\Desktop\ISTA, you must change that line in the code to match.
  • Note the double backslashes \\ are required in the .reg file format.

***

Alternative (Easier) Method:
If the file method is giving you errors, it is often easier to just do it manually. This prevents syntax errors.

1. Click Start, type regedit, and hit Enter.
2. Navigate through the folders on the left:
HKEY_LOCAL_MACHINE -> SOFTWARE -> WOW6432Node -> BMWGroup -> ISPI -> ISTA
*(If the BMWGroup, ISPI, or ISTA folders don't exist, right-click the parent folder -> New -> Key and name them exactly as shown).*
3. Once you are inside the ISTA folder on the left, look at the right side.
4. Right-click in the blank space on the right -> New -> String Value.
5. Name it: InstallLocation
6. Double-click InstallLocation and set the Value data to your actual folder path (e.g., C:\ISTA).
*(Note: When doing it manually here, use single backslashes like a normal folder path).*

Once that is set, try opening ISTA again.
Its all there and didn't work
 

Post #159

Its all there and didn't work

If the registry key is definitely correct (checked manually in Regedit) and it still fails to start, the issue is 99% likely to be missing Microsoft Visual C++ files.

This is the most common mistake: People install the 64-bit (x64) version because they have a 64-bit laptop, but ISTA requires the x86 (32-bit) version to run.

Please do these two steps exactly:

1. Install the x86 C++ Redistributable
Even if you think you have it, please reinstall it to be sure.
  • Go to the "Tools" or "Prereqs" folder in your download.
  • Find vcredist_x86.exe (usually 2015, 2017, or 2019).
  • Right-click and "Run as Administrator".
  • If it asks to Repair, click Repair.
  • If you don't have the file, download "Visual C++ Redistributable 2015-2022 x86" from Microsoft.

2. Unblock the Files
If you extracted the RAR file without "Unblocking" it first, Windows security treats the ISTA files as "foreign" and silently blocks them from running.
  • Go to your ISTA folder.
  • Find ISTAGUI.exe.
  • Right-click it -> Properties.
  • At the bottom of the General tab, look for a checkbox that says Unblock.
  • If you see it, check it and hit Apply. (If you don't see it, it's already unblocked).

After doing the x86 install, restart your laptop, then right-click ISTAGUI.exe and select Run as Administrator.

If it still fails, does it give an error message, or does the spinning circle just appear and then disappear with nothing happening?
 

Post #160

sorry no. I was letting you know that I got one when loading ista and one for loading the registry... to be clear, was I supposed to add all three lines on the registry or just the last line
 

Attachments

  • Screenshot 2026-02-13 185040.webp
    Screenshot 2026-02-13 185040.webp
    41.9 KB · Views: 85
Activity
So far there's no one here